Optimizer Tutorial
In this tutorial, we will walk through the key steps for building an optimizer for the ride-hailing challenge. We will implement a simple greedy optimizer in Java that connects to the simulation server, receives events, and responds with route proposals.
Our optimizer will maintain an internal representation of the road network and react to simulation events (such as vehicles becoming available or new ride requests arriving) by assigning each request to the closest available vehicle.
Table of Contents
- Getting Started
- Connecting to the Simulation
- Events
- Server Lifecycle Events
- The Road Network
- Ride Requests
- Vehicles
- Planning a Route
- Optimization Strategy
Getting Started
Before implementing a client, we will need to be able to run the simulation (server) and UI (visualisation client). Source code for simulation and UI can be found in the GECCO26-Competition repository.
Startup
After downloading the source code, the simulation, and the UI can be started via Docker.
The Docker compose (src/docker/compose) allows you to start all the containers with the correct settings; however, you must change the location of the data folder to match the relative path to the data folder in the project. This is done using the .env file in the repository that is stored to the docker-compose.yaml.
services:
  simulator:
    image: gitlab.informatik.uni-bremen.de:5005/evoal/vehicle-routing-problem/gecco26-competition/simulator:latest
    ports:
      - 8088:8088
    restart: unless-stopped
    volumes:
      # attach a directory relative to the directory containing this compose file
      - ${SCENARIO}:/data

  web-ui:
    image: gitlab.informatik.uni-bremen.de:5005/evoal/vehicle-routing-problem/gecco26-competition/web-ui:latest
    ports:
      - 8080:80
    restart: unless-stopped
Now, you can carry out the following command:
docker compose up
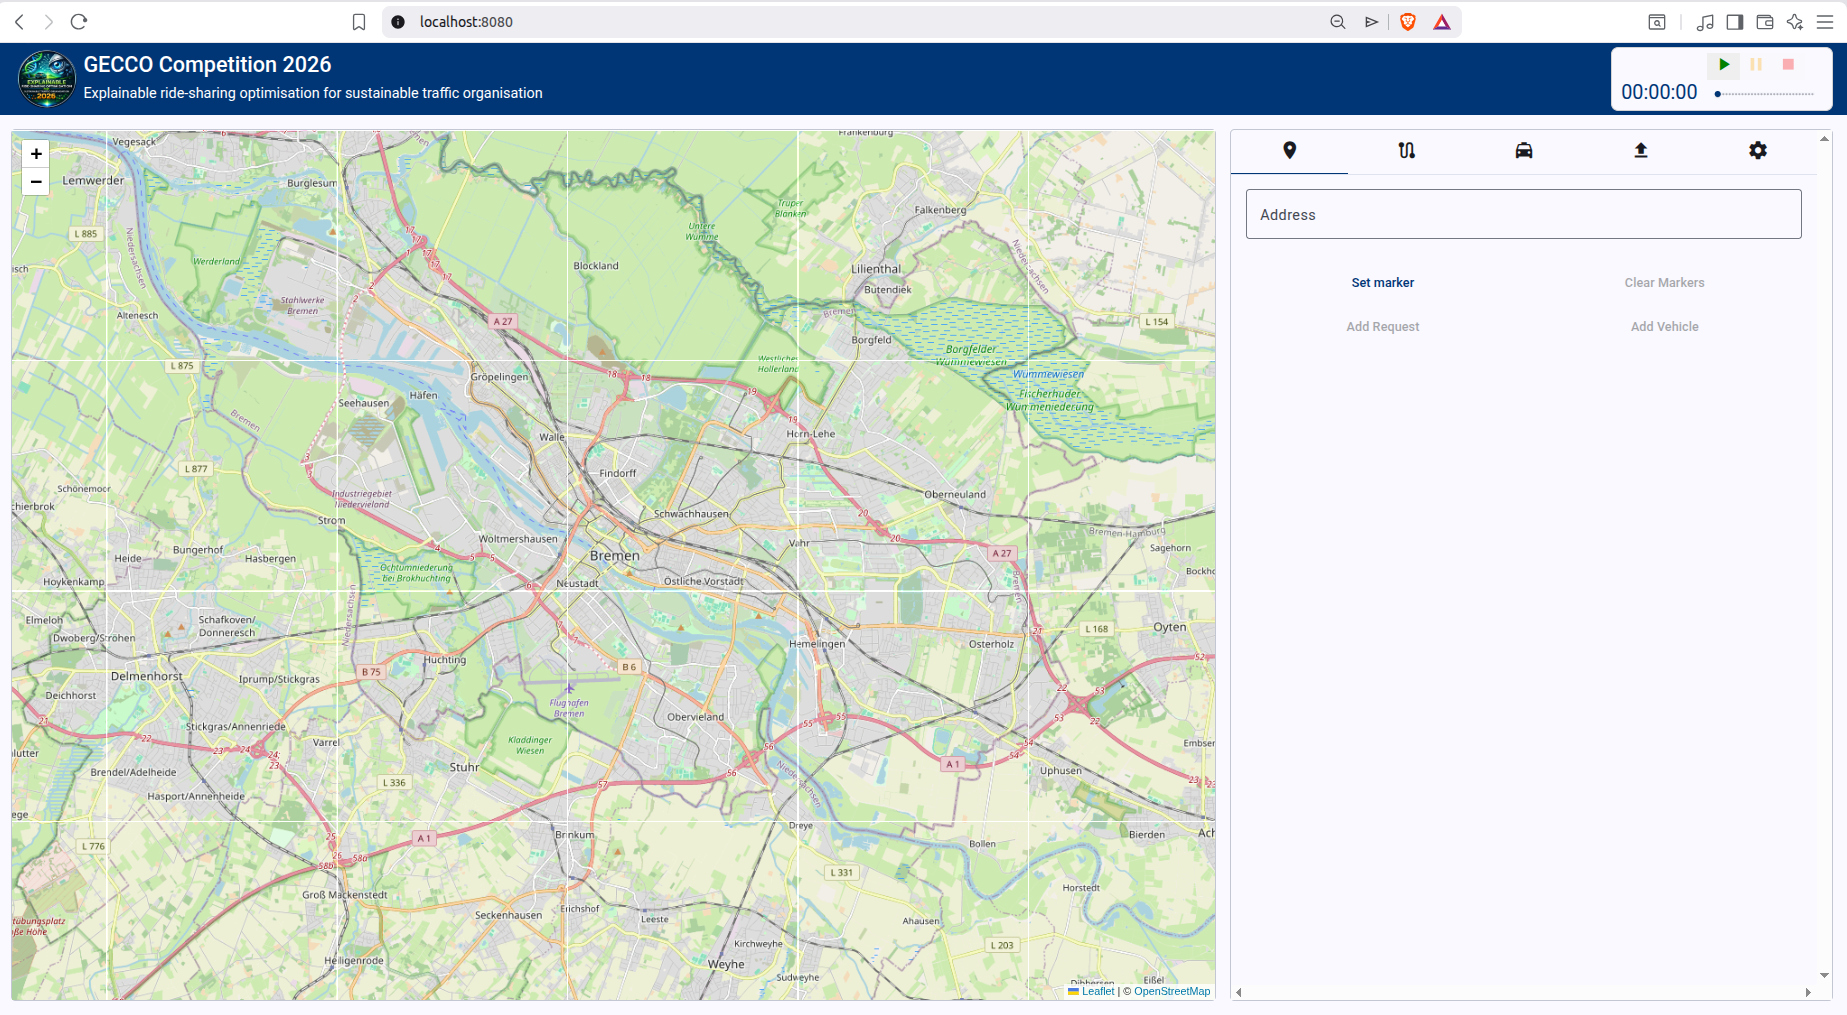
You should be able to access the UI at http://localhost:8080/.
Tutorial Code (Greedy Optimizer)
For this tutorial, we will implement an optimizer in Java. Source code can be found in the GECCO26-Competition repository, at src/java/greedy-optimizer; please feel encouraged to follow along in a programming language of your choice.
Connecting to the Simulation
STOMP (Simple Text Oriented Messaging Protocol) is a lightweight messaging protocol that runs over Websocket. It is how the client and simulator communicate. All Simulation and Optimizer events are exchanged as STOMP messages.
Connecting to the Server
On startup, the optimizer connects to the backend via a STOMP CONNECT message at: ws://localhost:8088/simulation-websocket
Important: You must include the custom STOMP header
role: OPTIMIZER. Without it, the server will reject the connection and won’t know which events to forward to your client.
In our Spring Boot application, we use the @PostConstruct annotation on our connect-method to ensure that it runs automatically once the StompSessionHandler is initialized:
@PostConstruct
public void connect() {
    final StompHeaders headers = new StompHeaders();
    headers.add("role", "OPTIMIZER");

    stompClient.connectAsync(
        url,  // ws://localhost:8088/simulation-websocket
        new WebSocketHttpHeaders(),
        headers,
        this
    );
}
Subscribing to the Events Topic
Once the STOMP session is established, the client subscribes to /topic/simulation-events. This is the broadcast destination where the server publishes simulation state updates to all connected subscribers.
@Override
public synchronized void afterConnected(StompSession session, @NonNull StompHeaders connectedHeaders) {
    log.info("Connected to STOMP server");
    log.info("Subscribing to /topic/simulation-events");

    this.session = session;

    session.subscribe("/topic/simulation-events", new StompFrameHandler() {
        ...
    });
}
Once this is set up properly, we can start our optimizer while the simulation is running. We expect to see a successful connect event as well as a subscription to the events topic:
INFO 194830 --- [greedy-optimizer] [           main] d.e.v.g.websocket.StompSessionHandler    : Connecting to ws://localhost:8088/simulation-websocket
INFO 194830 --- [greedy-optimizer] [ient-AsyncIO-17] d.e.v.g.websocket.StompSessionHandler    : Connected to STOMP server
INFO 194830 --- [greedy-optimizer] [ient-AsyncIO-17] d.e.v.g.websocket.StompSessionHandler    : Subscribing to /topic/simulation-events
Receiving Messages
After the client has subscribed to the events topic, it can receive messages from the server. The client should decide what to do with an incoming message.
In our Java client, we override the following methods in StompFrameHandler. Now, when we receive a message from the simulation, it will be parsed as an Event and handed off to the EventDispatcher, which will be discussed in detail in the next section.
@Override
public @NonNull Type getPayloadType(@NonNull StompHeaders headers) {
    return Event.class;
}

@Override
public void handleFrame(@NonNull StompHeaders headers, Object payload) {
    final Event event = (Event) payload;
    final List<Event> responses = eventDispatcher.handleEvent(event);
	responses.forEach(StompSessionHandler.this::send);
}
Sending Messages
To send a message to the server, the client publishes to the /sim/events destination. Along with the destination, the STOMP headers must include two additional fields identifying the event:
| Header | Value |
|---|---|
destination |
/sim/events |
name |
event.name |
category |
event.category |
The send() method below handles this, and guards against sending on a disconnected session:
private synchronized void send(final Event event) {
    if (session == null || !session.isConnected()) {
        return;
    }
    try {
        final StompHeaders headers = new StompHeaders();
        headers.add("destination", "/sim/events");
        headers.add("name", event.name);
        headers.add("category", event.category);
        session.send(headers, event);
    } catch (Exception e) {
        log.error("Failed to send event {}", event, e);
    }
}
Events
Communication between server and client is message-based, where each message describes an event. An event consists of three fields:
| Field | Type | Description |
|---|---|---|
category |
String |
Component responsible for event |
name |
String |
Specific event identifier |
data |
Map<String, Object> |
Arbitrary event payload |
A complete reference of all event types can be found here.
The optimizer does not need to handle every event — only those relevant to the optimization logic, plus a set of housekeeping events for initializing and resetting the simulation. The optimizer can also emit its own events, such as route-planning instructions.
To manage this, we define an EventDispatcher that maps each event (uniquely identified by category + name) to a designated handler method. Now, when an event is received, handleEvent is called and the specified method is applied.
@Service
public class EventDispatcher {


    private final Map<EventKey, Function<Event, Optional<Event>>> eventHandlers = new HashMap<>();

    public EventDispatcher(
            final WorldManager world,
            final GreedyOptimizer optimizer) {
        //example handlers
        eventHandlers.put(new EventKey("simulation", "reset"), optimizer::onReset);
        eventHandlers.put(new EventKey("simulation", "initialize"), this::respondWithStartSimulation);
        eventHandlers.put(new EventKey("request", "ride-request-received"), optimizer::planRoute);
        ...
    }


	public List<Event> handleEvent(Event event) {
	    final EventKey key = new EventKey(event.category, event.name);
	    return eventHandlers.getOrDefault(key, (e) -> {
	                return List.of();
	            })
	            .apply(event);
	}
}
Server Lifecycle: Initialization and Reset
The optimizer should handle (at least) two life-cycle events emitted by the server: simulation:initialize and simulation:reset.
Initialization
When simulation:initialize is received, the client enters an initializing state. During this time, initialization tasks such as fetching the road network data take place. Ultimately, the client should answer this event with a client:initialized event; however, this event should be sent after initialization tasks are completed (see Road Network Initialization ).
Reset
When simulation:reset is received, the client should perform any necessary cleanup before the next run begins. In our implementation, this means clearing all cached map data, vehicles, and requests.
The Road Network
A ride-hailing problem is situated within a road network consisting of roads (directed, weighted edges) and intersections (nodes). For a full explanation of the structure/format of the road network used in this challenge, see the road network documentation.
In our client, we create a model Road class with the following fields:
| Field | Type | Description |
|---|---|---|
id |
Long |
Unique identifier of Road. |
length |
double |
Length of edge in meters. |
maxSpeed |
int |
Maximum speed along edge in Km/h. |
properties |
Map<String, Object> |
Road properties, such as maximum-speed or length. |
Important: In our implementation, we will use duration instead of length as edge weights which inform shortest-path queries. Duration is calculated in seconds as
length / (maxSpeed*(1000.0/3600.0)).
We then add an Intersection class:
| Field | Type | Description |
|---|---|---|
id |
Long |
Unique identifier of Intersection. |
properties |
Map<String, Object> |
Additional Intersection properties, such as latitude and longitude. |
Initialization
During initialization (after the simulation:initialize event but before the run begins), the server signals to the client that the road network is
ready via a road-network:map-ready event. We register a handler method for this event, which will fetch the intersections and roads from separate
server endpoints:
| URL | Type | Description |
|---|---|---|
http://localhost:8088/simulation/road-network/intersections |
ResponseEntity<Map<String, Object>> |
All intersections belonging to road network instance. |
http://localhost:8088/simulation/road-network/roads |
ResponseEntity<Map<String, Object>> |
All roads belonging to road network instance. |
public List<Event> fetchRoadNetwork(final Event event) {
	// Get Intersections and add to internal representation
	ResponseEntity<Map[]> intersectionsResponse =
		restTemplate.getForEntity(this.url + "/intersections", Map[].class);
	Map<String, Object>[] intersectionsArray = intersectionsResponse.getBody();
	addIntersections(intersectionsArray);

	// Get Roads and add to internal representation
	ResponseEntity<Map[]> roadsResponse =
		restTemplate.getForEntity(this.url + "/roads", Map[].class);
	Map<String, Object>[] roadsArray = roadsResponse.getBody();
	addRoads(roadsArray);

	return List.of(new Event("client", "initialized"));
}
Note that this handler method must send a client:initialized event to signal to the server that the map data has been successfully transmitted and the initialization has completed.
The addIntersections and addRoads methods construct an internal representation of the road network in our client. For the purposes of this tutorial, we represent the road network as a DirectedWeightedPseudograph using the JGraphT framework, alongside maps of roads and intersections.
@Getter
private final Map<Long, Intersection> intersections = new HashMap<>();

@Getter
private final Map<Long, Road> roads = new HashMap<>();

@Getter
private final Graph<Intersection, Road> graph =
        new DirectedWeightedPseudograph<>(Road.class);

public void addIntersections(final Map<String, Object>[] intersections) {
	if (intersections == null) return;
	for(final Map<String, Object> i : intersections) {
	    Intersection intersection = new Intersection(((Number)i.get(ROAD_NETWORK_ATTRIBUTE_ID)).longValue(), i);
	    //Add to intersections map
	    this.intersections.put(intersection.getId(), intersection);
	    //Add to Directed Weighted Pseudograph
	    this.graph.addVertex(intersection);
	}
}

public void addRoads(final Map<String, Object>[] roads) {
        if (roads == null) return;
        for(final Map<String, Object> r : roads) {
            //parse road data
            long id = ((Number)r.get(ROAD_NETWORK_ATTRIBUTE_ID)).longValue();
            double length = (double)r.get(ROAD_NETWORK_ATTRIBUTE_LENGTH);
            int maxSpeed = (int)r.get(ROAD_NETWORK_ATTRIBUTE_MAX_SPEED);

            final Road road = new Road(id, length, maxSpeed, r);

            long startId = ((Number)r.get(ROAD_NETWORK_ATTRIBUTE_START_NODE)).longValue();
            long endId = ((Number)r.get(ROAD_NETWORK_ATTRIBUTE_END_NODE)).longValue();

            //find start and end intersections in intersections map
            final Intersection start = this.intersections.get(startId);
            final Intersection end = this.intersections.get(endId);

            //add road to roads map
            this.roads.put(id, road);

            //Add to Directed Weighted Pseudograph
            boolean added = this.graph.addEdge(start, end, road);
            if (!added) {
                log.warn("Failed to add edge for road {} from {} to {} — duplicate edge?", id, startId, endId);
                continue;
            }
            //Set edge weight to travel time of road
            this.graph.setEdgeWeight(road, road.duration());
        }
}
JGraphT provides built-in shortest-path algorithms, which we can make use of in a later step.
 public Optional<GraphPath<Intersection, Road>> shortestPath(long startId, long endId) {
    final Intersection start = intersections.get(startId);
    final Intersection end = intersections.get(endId);
    if (start == null || end == null) return Optional.empty();
    return Optional.ofNullable(
            new DijkstraShortestPath<>(graph).getPath(start, end)
    );
}
Changes to the Road Network
In dynamic simulation settings, the road network can change during a run. For example, a traffic jam may reduce the maximum-speed of a road, increasing the effective travel time for any routes passing through it. These changes are delivered via two events:road-network:changed-road-property and road-network:changed-intersection-property. These events contain the ID of the affected road or intersection, along with a properties map of updated key-value pairs.
We register handler methods for both events, which update our internal map representation accordingly. For example, the handler for road-network:changed-intersection-property:
public List<Event> changeIntersectionProperties(final Event event) {
    final Number intersectionId = event.get("intersection-id");
    final Map<String, Object> properties = event.get("properties");

    final Intersection intersection = intersections.get(intersectionId.longValue());
    intersection.getProperties().putAll(properties);

    return List.of();
}
Ride Requests
Ride Requests form the backbone of a ride-hailing scenario. It describes customers wanting to get from point A to point B, how many customers, optionally earliest and latest service times.
| Field | Type | Description |
|---|---|---|
id |
String |
Unique identifier of the Ride Request. |
start-intersection-id |
Long |
Position from which customers can be picked up. |
end-intersection-id |
Long |
Position where customers can be dropped off. |
earliest-service-time |
int |
Earliest time point at which customers can be picked up. |
latest-service-time |
int |
Latest time point at which customers can be dropped off. |
number-of-customers |
int |
Number of customers to be served. |
This information is sent to the client via a request:ride-request-received event. We register a handler.
eventHandlers.put(new EventKey("request", "ride-request-received"), optimizer::planRoute);
In the designated method, we can store the incoming ride request and decide now or later what to do with it (see Optimization Strategy ).
Vehicles
Vehicles serve requests. It is the job of the optimizer to plan which vehicles will serve which requests and which routes a vehicle will drive to accomplish this. As such, we model a Vehicle in our optimizer client.
| Field | Type | Description |
|---|---|---|
id |
String |
Unique identifier of Vehicle. |
position |
Intersection |
Current position of Vehicle. |
properties |
Map<String, Object> |
Additional vehicle properties, such as maximum-capacity or maximum-speed. |
Adding Vehicles
Vehicles are added to the simulation via the taxi-fleet:added-taxi event. We add a corresponding handler in our EventDispatcher class.
eventHandlers.put(new EventKey("taxi-fleet", "added-taxi"), optimizer::addVehicle);
In this method, we parse the added-taxi event and add the vehicle to a map:
private final Map<String, Vehicle> vehicles = new java.util.HashMap<>();

public List<Event> addVehicle(final Event event) {
    final String vehicleId = event.get("id");
    final long intersectionId = ((Number)event.get("intersection-id")).longValue();
    final Map<String, Object> properties = event.get("properties");

    log.info("Adding vehicle {}.", vehicleId);

    Vehicle newVehicle;
    synchronized (vehicles) {
        final Intersection intersection = world.getIntersection(intersectionId);
        final int maxCapacity = Optional.ofNullable((Number) properties.get("maximum-capacity"))
                .map(Number::intValue)
                .orElse(Integer.MAX_VALUE);
        newVehicle = new Vehicle(vehicleId, intersection, maxCapacity, properties);
        vehicles.put(vehicleId, newVehicle);
    }

  // attempt assignment immediately for the new vehicle
  return tryAssignVehicle(newVehicle);
}
Note that we also attempt to assign the new vehicle to any as-of-yet unserved request. This is discussed in more detail in the Optimization Strategy section.
Removing Vehicles
Similarly, our client is notified about vehicles removed from the scenario via a taxi-fleet:removed event containing the ID of the removed vehicle.
Updates to a Vehicle’s Position
As a vehicle moves through the road network in the server-side simulation, our client will be notified about certain events, such as when a vehicle has passed an intersection. This allows our client to keep track of where each vehicle is located and the status of any requests a vehicle is serving.
vehicle:passed-intersection: this event fires when a vehicle passes an intersection. It containsvehicle-idandintersection-idfields.vehicle:route-event: this event fires when a routing event such aspick-up-passengersordrop-off-passengersoccurs.vehicle:finished-move: this event fires when a vehicle has completed a move planned by our client (see planning a route), and containsvehicle-idandmove-idfields. This event is particularly useful for knowing when a vehicle is ready for a new customer.
In our client, we register handlers for vehicle:passed-intersection and vehicle:finished-move events. When a vehicle passes an intersection, we update the position field stored inside of the Vehicle:
public List<Event> updateVehiclePosition(final Event event) {
    final String vehicleId = event.get("vehicle-id");
    final Number intersectionId = event.get("intersection-id");

    final Vehicle vehicle = vehicles.get(vehicleId);
    final Intersection intersection = world.getIntersection(intersectionId.longValue());

    vehicle.setPosition(intersection);

    return List.of();
}
When a vehicle finishes a move, our client will attempt to find a new request to assign to the vehicle. This is detailed below in the Optimization Strategy section.
Planning a Route
Our optimizer client controls vehicles by planning their routes. For example, we might plan a route to serve a request (drive to the start intersection of the request, pick up customers, drive to the end intersection of the request, drop of customers). Alternatively, we might plan a simple repositioning request (drive to a specified target node without any customer pick-ups or drop-offs).
Our client informs the simulation of these plans by emitting a taxi-fleet:plan-route event, which instructs the simulation to move the vehicle along the planned route.
| Field | Type | Description |
|---|---|---|
move-id |
String |
Unique identifier for this move (e.g. move-0) |
vehicle-id |
String |
The vehicle to assign the route to |
route |
List<Step> |
Ordered list of steps the vehicle should execute |
Route Structure
A route is an ordered sequence of steps. There are three step types:
| Step type | Fields | Description |
|---|---|---|
follow-road |
road-id |
Move the vehicle along a road segment |
pick-up-passengers |
request-id, intersection-id, count |
Pick up passengers at the start intersection |
drop-off-passengers |
request-id, intersection-id, count |
Drop off passengers at the destination |
Implementation
In this tutorial, we only plan routes associated with serving requests and do not implement any repositioning strategy. Route planning is split into two shortest-path queries using JGraphT:
- From the vehicle’s current position to the passenger’s pickup intersection
- From the pickup intersection to the drop-off intersection
private Optional<List<Map<String, Object>>> findRoute(final Vehicle vehicle, final RideRequest request) {
    final Optional<GraphPath<Intersection, Road>> toPassenger =
            world.shortestPath(vehicle.getPosition().getId(), request.getStartIntersection().getId());

    final Optional<GraphPath<Intersection, Road>> toDestination =
            world.shortestPath(request.getStartIntersection().getId(), request.getEndIntersection().getId());

    if (toPassenger.isEmpty() || toDestination.isEmpty()) {
        log.warn("No path found for request {}", request.getId());
        return Optional.empty();
    }

    ...//see below
}
Each graph path is converted to a list of follow-road steps via toSimulationSteps(), which maps each road edge to its simulation representation:
private @NonNull List<Map<String, Object>> toSimulationSteps(GraphPath<Intersection, Road> path) {
    return path.getEdgeList().stream()
            .map(road -> new FollowRoad(road.getId()).toMap())
            .collect(Collectors.toCollection(LinkedList::new));
}
In between the two graph paths, we need to add a pick-up-passengers step, and after the second graph path, we schedule a drop-off-passengers step.
private Optional<List<Map<String, Object>>> findRoute(final Vehicle vehicle, final RideRequest request) {
    ... //see above

    final List<Map<String, Object>> result = new LinkedList<>(toSimulationSteps(toPassenger.get()));
    result.add(Map.of("type", "pick-up-passengers", "request-id", request.getId(),
            "intersection-id", request.getStartIntersection().getId(), "count", vehicle.getMaxCapacity()));
    result.addAll(toSimulationSteps(toDestination.get()));
    result.add(Map.of("type", "drop-off-passengers", "request-id", request.getId(),
            "intersection-id", request.getEndIntersection().getId(), "count", vehicle.getMaxCapacity()));

    return Optional.of(result);
}
Once the route is assembled, it is wrapped in a taxi-fleet:plan-route event and returned to the EventDispatcher for dispatch:
private Optional<Event> assignRequestToVehicle(Vehicle vehicle, RideRequest request) {
    return findRoute(vehicle, request).map(route -> {
        final Event response = new Event("taxi-fleet", "plan-route");
        response.put("move-id", "move-" + counter.getAndIncrement());
        response.put("route", route);
        response.put("vehicle-id", vehicle.getId());
        return response;
    });
}
Example Route
Below is an example of a taxi-fleet:plan-route event payload:
{
  "move-id": "move-1",
  "vehicle-id": "taxi-2",
  "route": [
    { "type": "follow-road", "road-id": "33748" },
    ...
    { "type": "follow-road", "road-id": "37015" },
    {
      "type": "pick-up-passengers",
      "request-id": "request-2",
      "intersection-id": "247422894",
      "count": 1
    },
    { "type": "follow-road", "road-id": "33749" },
    ...
    { "type": "follow-road", "road-id": "33739" },
    {
      "type": "drop-off-passengers",
      "request-id": "request-2",
      "intersection-id": "243974386",
      "count": 1
    }
  ]
}
Optimization Strategy
At this point, we have a road network, vehicles, and ride requests. We are also able to plan routes and track vehicle positions. What remains is deciding how to assign requests to vehicles — in other words, defining our optimization strategy.
In this tutorial, we implement a simple greedy strategy: each incoming request is assigned to the closest available (i.e., non-busy) vehicle.
Handling Incoming Requests
We start by reacting to a new ride request in the planRoute method. When a request arrives, the optimizer:
- Extracts request data from the event
- Checks for available vehicles
- Assigns the request to the closest free vehicle
- Repeats the process if the request requires multiple vehicles
public List<Event> planRoute(final Event event) {
    // Extract request information
    String requestId = event.get("id");
    Intersection startIntersection = world.getIntersection(((Number) event.get("start-intersection-id")).longValue());
    Intersection endIntersection = world.getIntersection(((Number) event.get("end-intersection-id")).longValue());

    if (startIntersection == null || endIntersection == null) {
        return List.of(); // Invalid request
    }

    // For simplicity, we ignore earliest and latest service times
    final RideRequest request = new RideRequest(
        event.get("earliest-service-time") != null
            ? ((Number) event.get("earliest-service-time")).intValue() : 0,
        event.get("latest-service-time") != null
            ? ((Number) event.get("latest-service-time")).intValue() : Integer.MAX_VALUE,
        startIntersection,
        endIntersection,
        requestId,
        ((Number) event.get("number-of-customers")).intValue()
    );

    List<Event> responses = new ArrayList<>();
    Optional<Vehicle> closestFreeVehicle = closestVehicleToLocation(startIntersection.getId());

    // Assign request to as many vehicles as needed/available
    while (closestFreeVehicle.isPresent() && request.getRemainingCustomers() > 0) {
        Vehicle vehicle = closestFreeVehicle.get();
        Optional<Event> response = assignRequestToVehicle(vehicle, request);

        if (response.isPresent()) {
            responses.add(response.get());
            vehicle.setBusy(true);

            int servedCustomers = Math.min(vehicle.getMaxCapacity(), request.getRemainingCustomers());
            request.setRemainingCustomers(request.getRemainingCustomers() - servedCustomers);
        } else {
            break;
        }

        closestFreeVehicle = closestVehicleToLocation(startIntersection.getId());
    }

    // Store partially fulfilled requests
    if (request.getRemainingCustomers() > 0) {
        openRequests.put(request.getId(), request);
    }

    return responses;
}
Note: A single request may involve more customers than a vehicle can carry. In that case, we assign multiple vehicles until either the request is fully served or no vehicles are available. Any remaining demand is stored as an open request.
Handling Available Vehicles
We also need to process open requests when vehicles become available again. This happens when a vehicle finishes a move, triggering the vehicle:finished-move event.
When handling this event, we:
- Find the closest open request
- Assign the vehicle if possible, otherwise mark the vehicle as available.
public List<Event> vehicleAvailable(final Event event) {
    final String vehicleId = event.get("vehicle-id");
    final Vehicle vehicle = vehicles.get(vehicleId);
    return tryAssignVehicle(vehicle);
}

private List<Event> tryAssignVehicle(final Vehicle vehicle) {
    Optional<RideRequest> closestRequest = closestRequestToLocation(vehicle.getPosition());

    if (closestRequest.isEmpty()) {
        synchronized (vehicles) {
            vehicle.setBusy(false);
        }
        return List.of();
    }

    RideRequest request = closestRequest.get();

    Optional<Event> response = assignRequestToVehicle(vehicle, request);
    if (response.isPresent()) {
        vehicle.setBusy(true);

        int servedCustomers = Math.min(vehicle.getMaxCapacity(), request.getRemainingCustomers());
        int remainingCustomers = request.getRemainingCustomers() - servedCustomers;
        request.setRemainingCustomers(remainingCustomers);

        if (remainingCustomers <= 0) {
            openRequests.remove(request.getId());
        }

        return List.of(response.get());
    } else {
        return List.of();
    }
}
Vehicle Added
Similarly, when a new vehicle is added to the simulation, we do not only add it to the map of vehicles in our optimizer, but also attempt to assign it to the closest unserved request, as described in Vehicles.
public List<Event> addVehicle(final Event event) {
    final String vehicleId = event.get("id");
    final long intersectionId = ((Number)event.get("intersection-id")).longValue();
    final Map<String, Object> properties = event.get("properties");

    Vehicle newVehicle;
    synchronized (vehicles) {
        final Intersection intersection = world.getIntersection(intersectionId);
        final int maxCapacity = Optional.ofNullable((Number) properties.get("maximum-capacity"))
                .map(Number::intValue)
                .orElse(Integer.MAX_VALUE);
        newVehicle = new Vehicle(vehicleId, intersection, maxCapacity, properties);
        vehicles.put(vehicleId, newVehicle);
    }

  // attempt assignment immediately for the new vehicle
  return tryAssignVehicle(newVehicle);
}